해당 글은 SwiftUI 환경에서 페이지를 이동하거나 이동 시 데이터를 전달하는 방법에 대해서 공유합니다.
0) 개발 환경
구분
구분 종류
버전
언어
Swift
5.7.2
개발 환경
IOS
16.2
UI Interface
SwiftUI
개발 도구
XCode
14.2
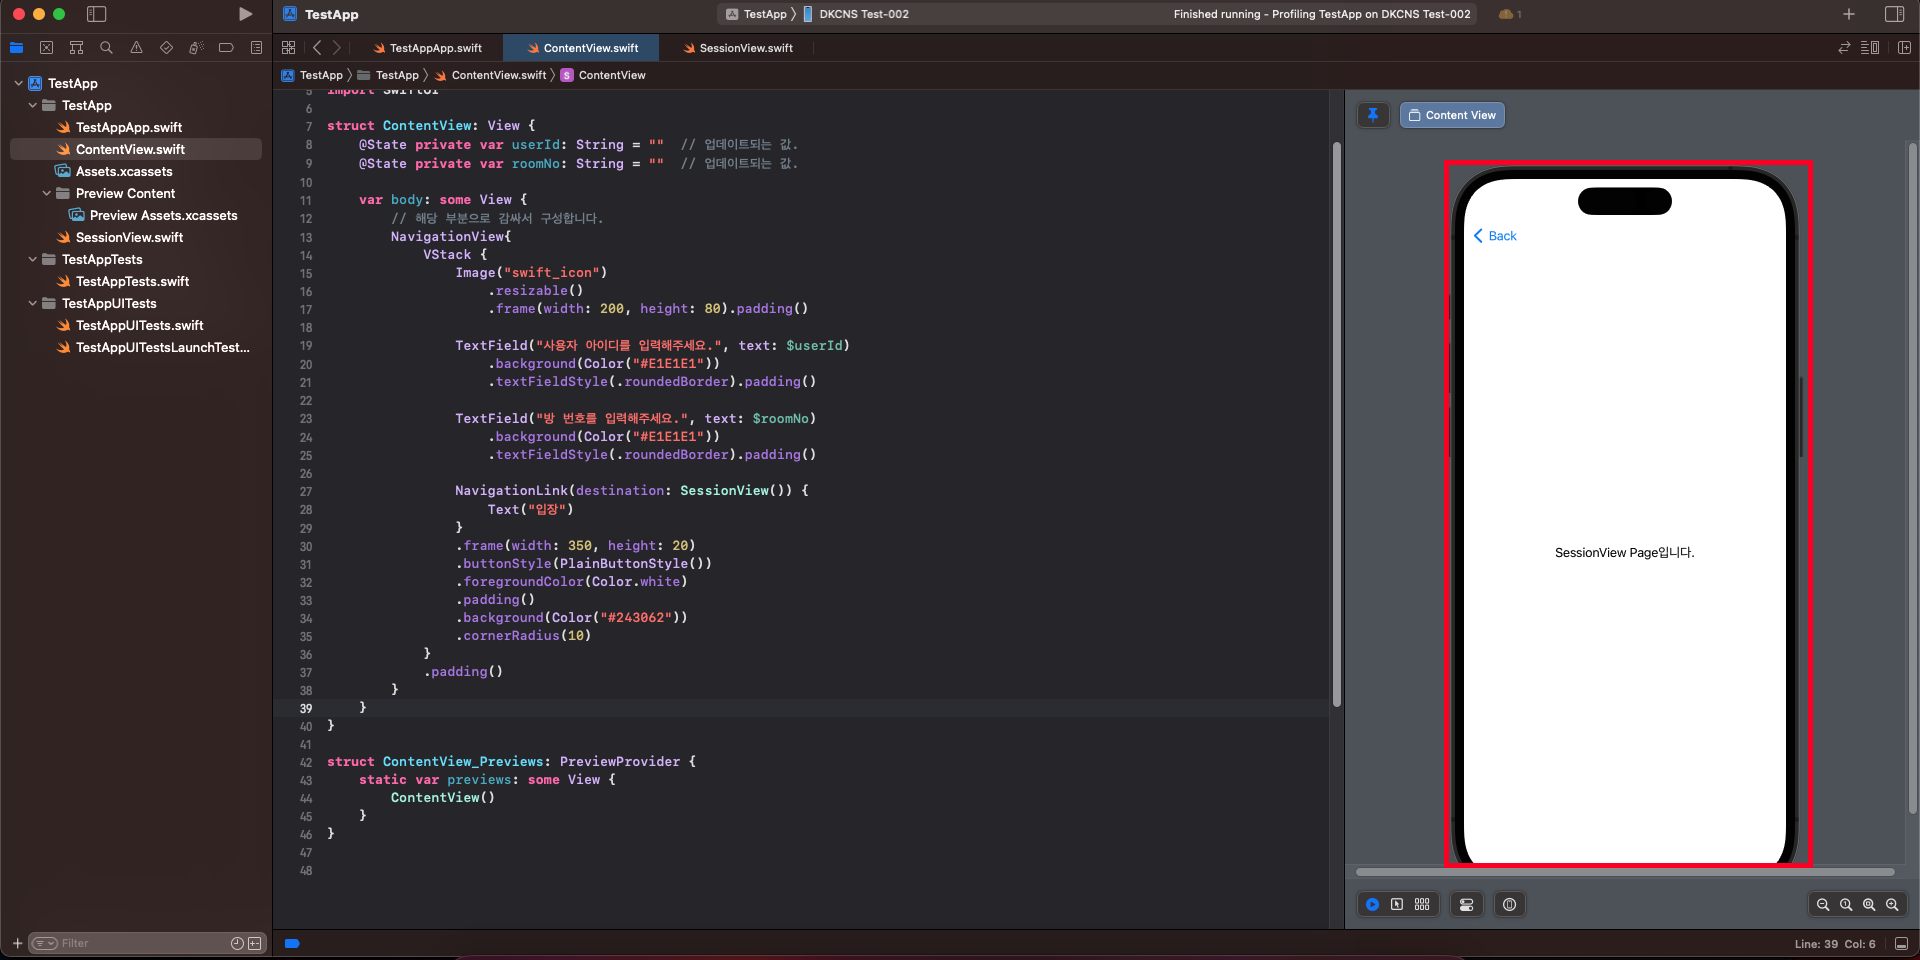
1) View 간의 이동 방법 : NavigationView, NavigationLink
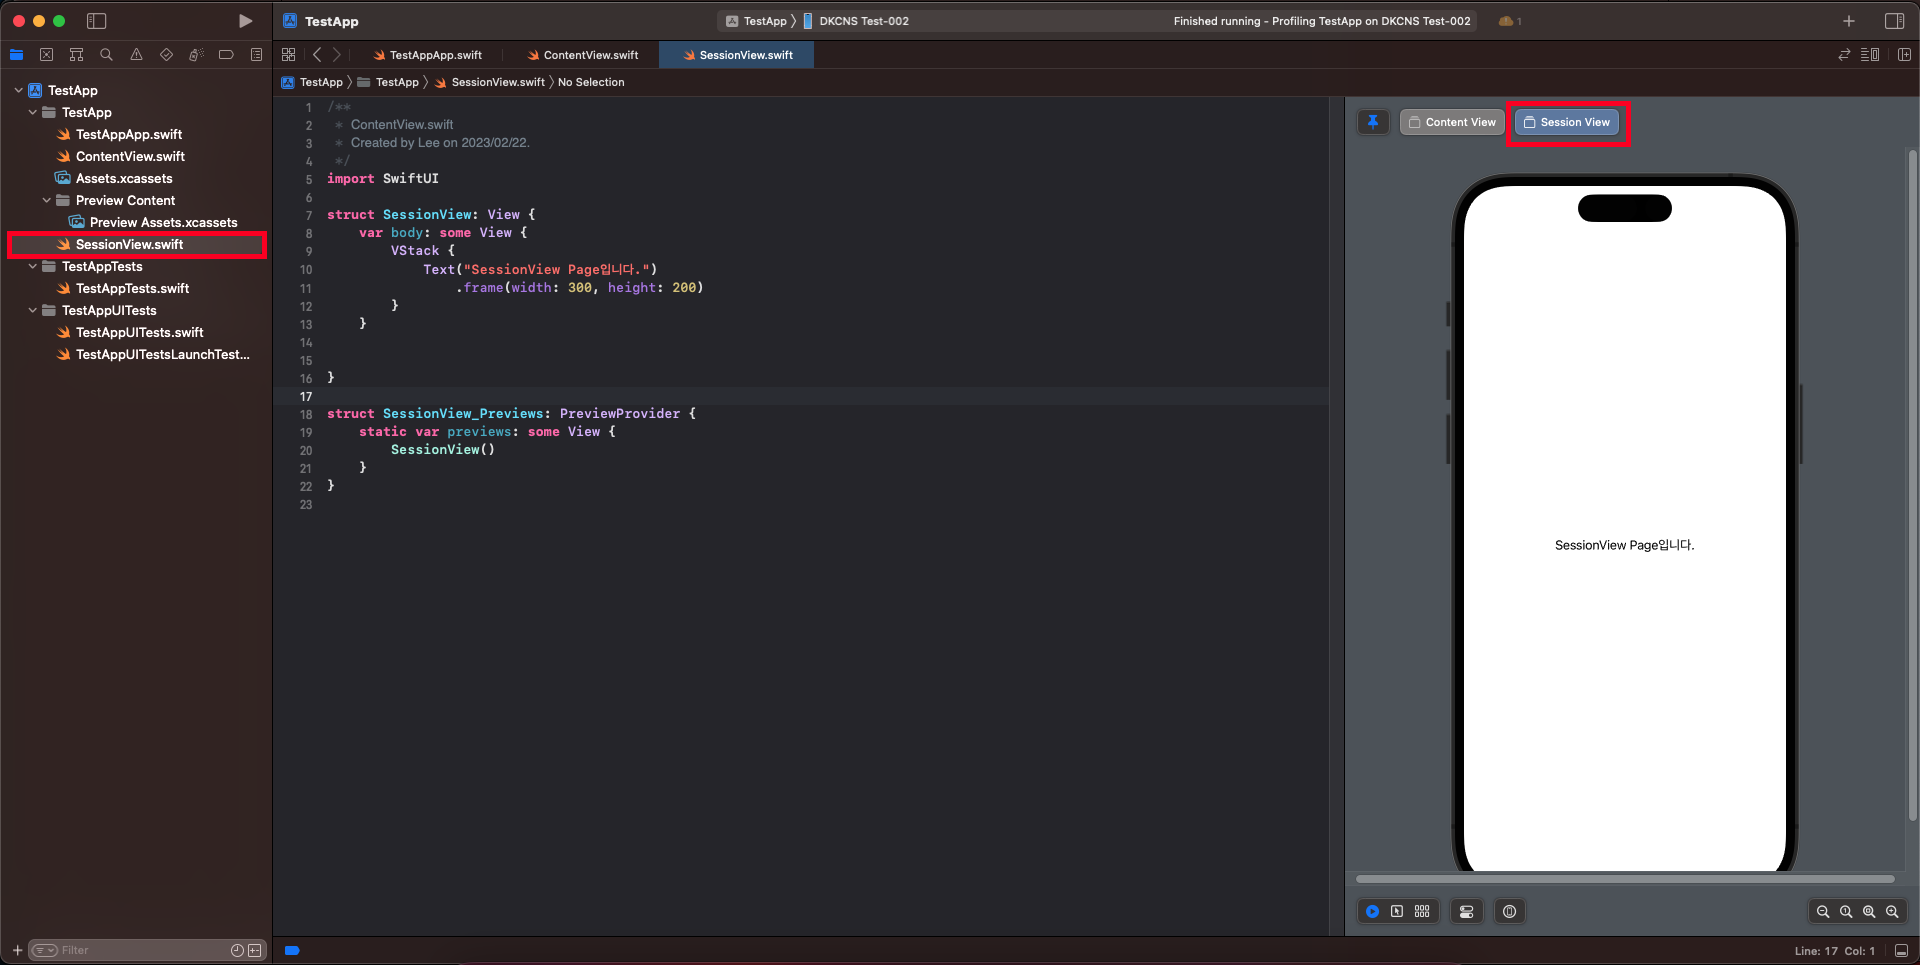
1. ContentView에서 SessionView로 이동을 하는 예시를 구성하기 위해 SessionView라는 파일을 생성하였습니다.
/**
 * SessionView.swift
 * Created by Lee on 2023/02/22.
 */
import SwiftUI

struct SessionView: View {
    var body: some View {
        VStack {
            Text("SessionView Page입니다.")
                .frame(width: 300, height: 200)
        }
    }

}

struct SessionView_Previews: PreviewProvider {
    static var previews: some View {
        SessionView()
    }
}
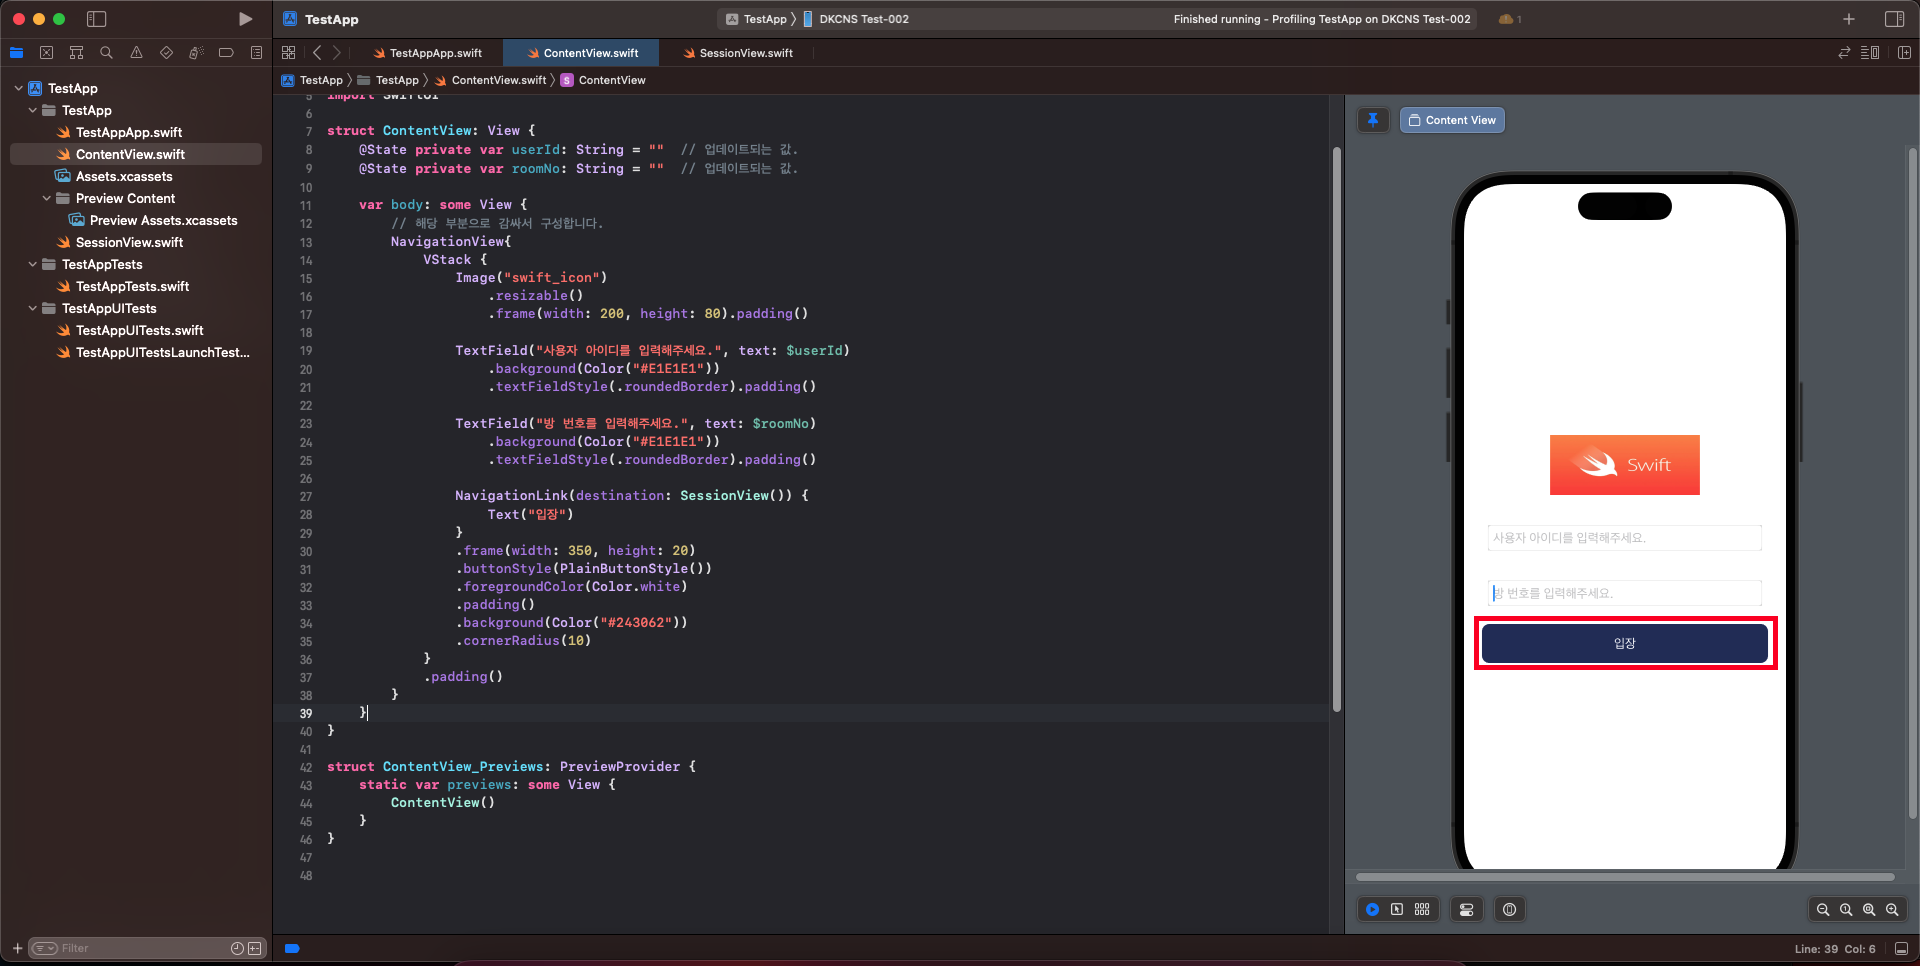
2. 기존의 View 소스를 NavigationView로 감싸서 구성합니다.
/**
 * ContentView.swift
 * Created by Lee on 2023/02/22.
 */
import SwiftUI

struct ContentView: View {
    @State private var userId: String = ""  // 업데이트되는 값.
    @State private var roomNo: String = ""  // 업데이트되는 값.

    var body: some View {
        // 해당 부분으로 감싸서 구성합니다.
        NavigationView{
            VStack {
                Image("swift_icon")
                    .resizable()
                    .frame(width: 200, height: 80).padding()

                TextField("사용자 아이디를 입력해주세요.", text: $userId)
                    .background(Color("#E1E1E1"))
                    .textFieldStyle(.roundedBorder).padding()

                TextField("방 번호를 입력해주세요.", text: $roomNo)
                    .background(Color("#E1E1E1"))
                    .textFieldStyle(.roundedBorder).padding()

                NavigationLink(destination: SessionView()) {
                    Text("입장")
                }
                .frame(width: 350, height: 20)
                .buttonStyle(PlainButtonStyle())
                .foregroundColor(Color.white)
                .padding()
                .background(Color("#243062"))
                .cornerRadius(10)
            }
            .padding()
        }
    }
}

struct ContentView_Previews: PreviewProvider {
    static var previews: some View {
        ContentView()
    }
}
3. 기존에 Button으로 구성되던 부분에 대해서 NavigationLink으로 재 구성합니다.
/**
* 변경 이전 코드
*/
Button(action: {
// 버튼이 눌렸을 때 실행되는 액션
}) {
    Text("입 장")
        .frame(width: 350, height: 20)
        .buttonStyle(PlainButtonStyle())
        .foregroundColor(Color.white)
        .padding()
        .background(Color("#243062"))
        .cornerRadius(10)
}
/**
* 변경 이후 코드
*/
NavigationLink(destination: SessionView()) {
                    Text("입장")
                }
                .frame(width: 350, height: 20)
                .buttonStyle(PlainButtonStyle())
                .foregroundColor(Color.white)
                .padding()
                .background(Color("#243062"))
                .cornerRadius(10)
4. 최종 구성을 완료하였습니다.
/**
 * ContentView.swift
 * Created by Lee on 2023/02/22.
 */
import SwiftUI

struct ContentView: View {
    @State private var userId: String = ""  // 업데이트되는 값.
    @State private var roomNo: String = ""  // 업데이트되는 값.

    var body: some View {
        // 해당 부분으로 감싸서 구성합니다.
        NavigationView{
            VStack {
                Image("swift_icon")
                    .resizable()
                    .frame(width: 200, height: 80).padding()

                TextField("사용자 아이디를 입력해주세요.", text: $userId)
                    .background(Color("#E1E1E1"))
                    .textFieldStyle(.roundedBorder).padding()

                TextField("방 번호를 입력해주세요.", text: $roomNo)
                    .background(Color("#E1E1E1"))
                    .textFieldStyle(.roundedBorder).padding()

                NavigationLink(destination: SessionView()) {
                    Text("입장")
                }
                .frame(width: 350, height: 20)
                .buttonStyle(PlainButtonStyle())
                .foregroundColor(Color.white)
                .padding()
                .background(Color("#243062"))
                .cornerRadius(10)
            }
            .padding()
        }
    }
}

struct ContentView_Previews: PreviewProvider {
    static var previews: some View {
        ContentView()
    }
}
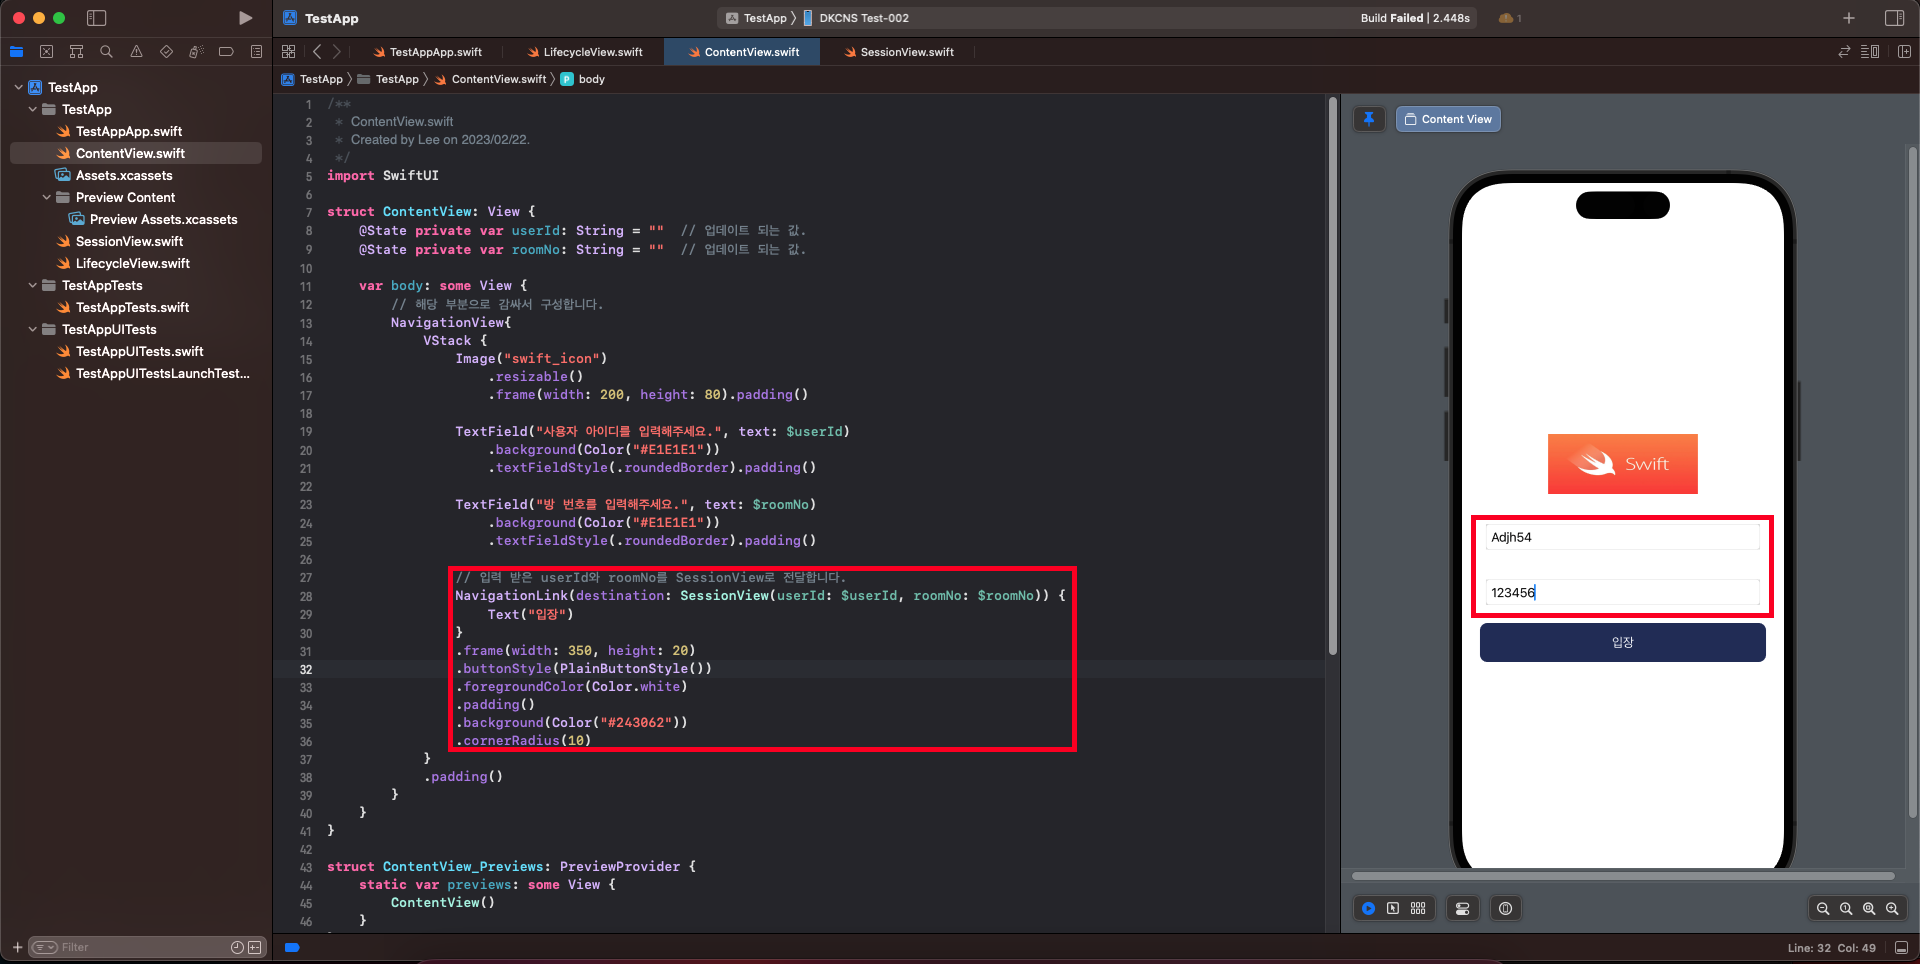
2) View 간의 데이터 전달 방법 : NavigationLink
1. 부모 페이지에서 버튼을 클릭할 때 @State로 입력받은 값에 대해서 전달합니다.
struct ContentView: View {
    @State private var userId: String = ""  // 업데이트 되는 값.
    @State private var roomNo: String = ""  // 업데이트 되는 값.

    var body: some View {
        // 해당 부분으로 감싸서 구성합니다.
        NavigationView{
            VStack {
                Image("swift_icon")
                    .resizable()
                    .frame(width: 200, height: 80).padding()

                TextField("사용자 아이디를 입력해주세요.", text: $userId)
                    .background(Color("#E1E1E1"))
                    .textFieldStyle(.roundedBorder).padding()

                TextField("방 번호를 입력해주세요.", text: $roomNo)
                    .background(Color("#E1E1E1"))
                    .textFieldStyle(.roundedBorder).padding()

                // 입력 받은 userId와 roomNo를 SessionView로 전달합니다.
                NavigationLink(destination: SessionView(userId: $userId, roomNo: $roomNo)) {
                    Text("입장")
                }
                .frame(width: 350, height: 20)
                .buttonStyle(PlainButtonStyle())
                .foregroundColor(Color.white)
                .padding()
                .background(Color("#243062"))
                .cornerRadius(10)
            }
            .padding()
        }
    }
}
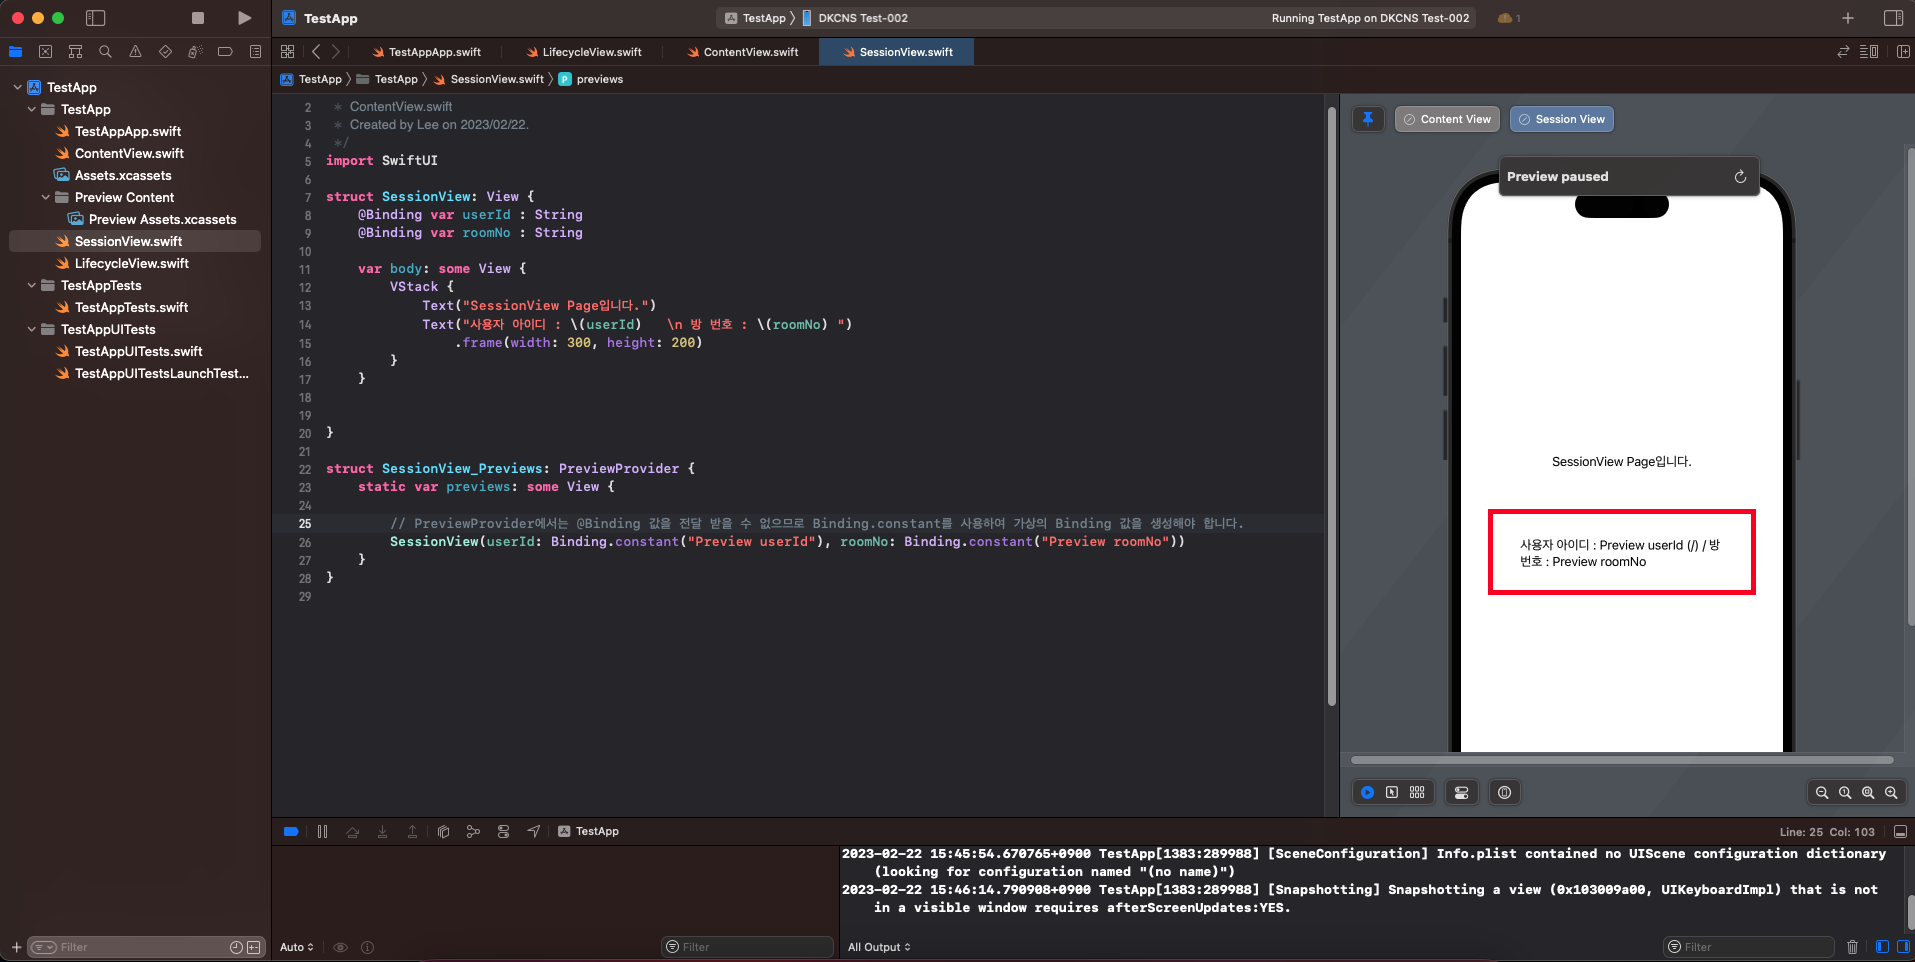
2. 자식 페이지에서는 @Binding을 통해서 해당 값을 받아서 화면상에 출력합니다.
💡 PreviewProvider에서는 @Binding 값을 전달받을 수 없으므로 Binding.constant를 사용하여 가상의 Binding 값을 생성해야 합니다. 가상의 값으로 출력이 되었습니다.
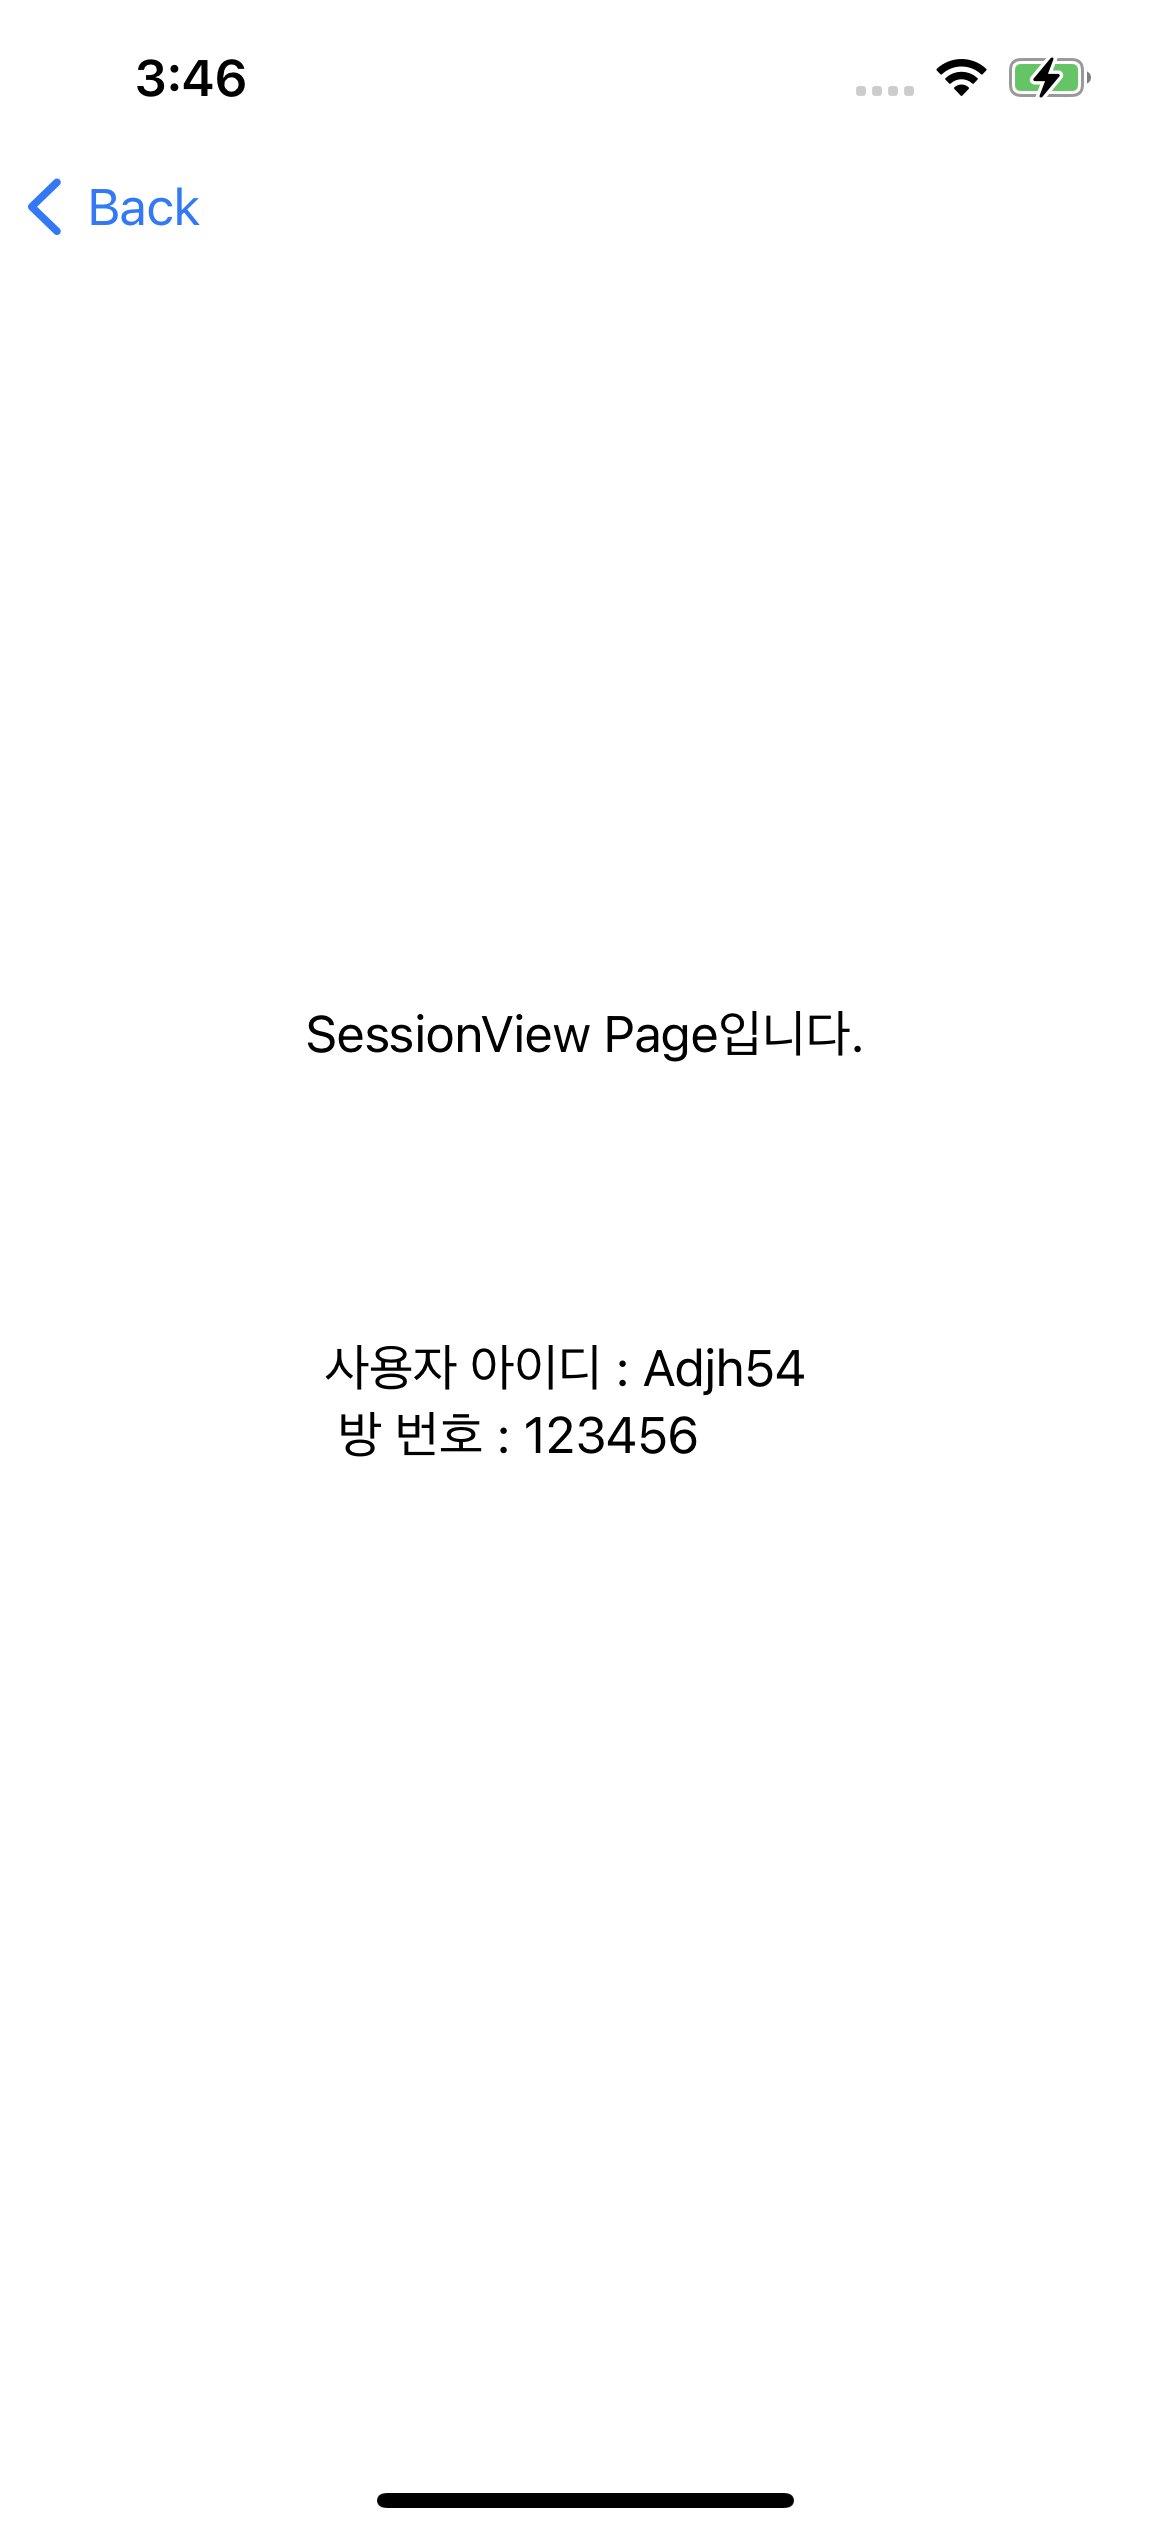
💡 실제 모바일 기기에서는 아래와 같이 입력한 값을 전달받았습니다.
/**
 * ContentView.swift
 * Created by Lee on 2023/02/22.
 */
import SwiftUI

struct SessionView: View {
    @Binding var userId : String
    @Binding var roomNo : String

    var body: some View {
        VStack {
            Text("SessionView Page입니다.")
            Text("사용자 아이디 : \\(userId)   \\n 방 번호 : \\(roomNo) ")
                .frame(width: 300, height: 200)
        }
    }


}

struct SessionView_Previews: PreviewProvider {
    static var previews: some View {

        // PreviewProvider에서는 @Binding 값을 전달할 수 없으므로 Binding.constant를 사용하여 가상의 Binding 값을 생성해야 합니다.
        SessionView(userId: Binding.constant("Preview userId"), roomNo: Binding.constant("Preview roomNo"))
    }
}